Cover
Warning
This book is under development. Some chapters are still incomplete and the content may change without notice.
Warning
This book is under development. Some chapters are still incomplete and the content may change without notice.
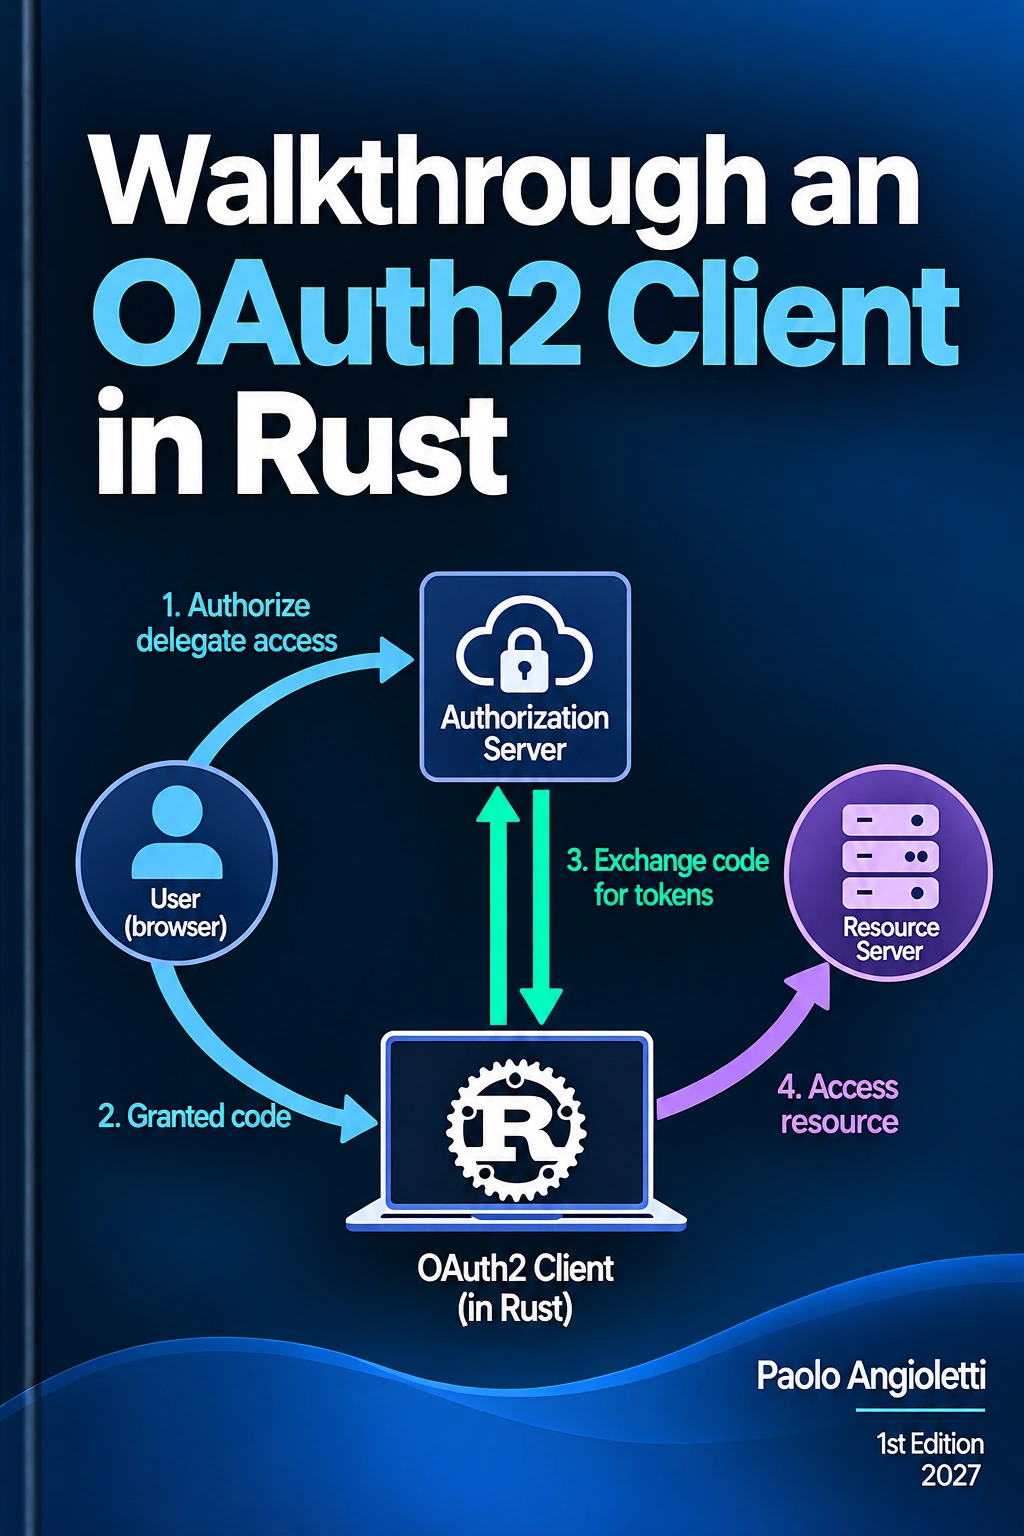
Walkthrough an OAuth2 Client in Rust
This book explains how to implement an OAuth2 / OIDC (OpenID Connect) Client application in Rust language using the Tokio asynchronous runtime and library stack.
By adopting the best Rust idioms and coding practices, we demonstrate how to run through the OAuth2 Authorization Code Grant (see RFC 6749, §4.1) and how to execute the Refreshing an Access Token operation (see RFC 6749, §6). We demonstrate how to make our OAuth2 Client application interact with some of the most popular OAuth2 Authorization Servers, such as Google Accounts, GitHub, LinkedIn, Keycloak, just to name a few of those built with IdP - Identity Provider capabilities.
The full Rust source code of this OAuth2 Client application is open source and publicly available on GitHub at https://github.com/pangiole/oauth2-client.
Note
This book explains how to:
discover the identity provider’s endpoints from its
/.well-known/openid-configurationdocument.generate a CSRF
stateand an OIDCnonce, then open the provider authorize URL in the browser.start an ephemeral HTTP server on
127.0.0.1:0to receive the authorization code on a/callbackendpoint.exchange the returned auth code for tokens, validate the ID token, and persist the refresh token to disk.
on subsequent runs, exchange the stored refresh token for a new access token and fall back to the browser flow only when that fails.
Warning
This book is under development. Some chapters are still incomplete and the content may change without notice.
Tip
Always depend on just a few accurately selected crates, and explicitly tune their features to avoid bloat.
Dependencies
As you can read from our Cargo.toml file, our OAuth2 Client application is written against just a few dependencies, chosen amongst the most popular Cargo (Rust’s package manager) crates nowadays, namely:
-
anyhow
a trait object based error type for easy idiomatic error handling; -
dotenvy
a library that loads environment variables from a .env file; -
tokio
the most dominant asynchronous runtime for I/O bound applications; plus a few other “tokio family” crates: -
openidconnect
a library for implementing our OIDC client, itself built on theoauth2crate;
When it comes to dependencies, rather than explain what each of them actually does, this chapter is more concerned on teaching “self-restraint”, especially when surrounded by abundance.
Bloating
In the Rust ecosystem, dependency bloating refers to the tendency for projects to accumulate a massive, often disproportionate number of third-party libraries (crates) — and in turn, massive compiled binary sizes and painfully long build times.
Because Cargo and crates.io make it exceptionally easy to pull in external packages, developers frequently add more and more crates, even for minor tasks rather than writing a few lines of native code by themselves.
The key symptoms of dependency bloat are:
-
Exploding Dependency Trees
A project depending on just 5 direct crates can easily pull in 100+ transitive dependencies (dependencies of our dependencies). Try to run:cargo treeand get impressed by how many
(crate, version)pairs Cargo resolves by transitively walking dependencies, even though only few were explicitly named in the projectCargo.tomlfile. -
Ballooning Binary Sizes
Rust compiles code statically by default, and features like monomorphization (generating specialized machine code for every generic type we use) can cause unused or bloated generic functions to inflate our final executable.A complementary remedy — conditional compilation driven by Cargo feature flags — is covered later in the Conditional Compilation section.
-
Slow Compile Times
Compiling a deep dependency tree taxes the Rust compiler heavily, greatly increasing initial build times. -
Security & Maintenance Overhead
Every external crate expands our “circle of trust”. More dependencies mean more surface area for vulnerabilities, breaking changes, and supply-chain risks.
Features
One of the most effective remedies to reduce dependency bloating is tuning
the feature flags for those few crates we intend to depend on, and that
we explicitly named in our Cargo.toml file.
In Rust, features are a mechanism provided by Cargo that allow a crate to offer optional functionality. Instead of bundling every possible capability into a library by default, authors use feature flags to let consumers opt into specific modules, transitive dependencies, or integrations with other libraries.
Under the hood, a Cargo feature is consumed by the crate’s own source code
through conditional compilation. The author wraps the optional code in a
#[cfg(feature = "...")] attribute, so the Rust compiler only compiles that
code when the corresponding feature is switched on. In other words, enabling a
feature in Cargo.toml flips a compile-time switch: Cargo translates every
active feature into a --cfg feature="..." flag passed down to rustc, and
rustc in turn keeps or discards each #[cfg(...)]-gated block accordingly.
By default, many popular Rust crates are configured with “fat” default
features meaning they turn on every bell and whistle so they work
out-of-the-box for the widest possible audience. If we don’t tune them, we can
accidentally pull in massive transitive dependency trees for features our
application never touches. For example, this is how we disable the
default-features of the anyhow crate that our application depends on:
[dependencies.anyhow]
    version = "1.0.104"
    default-features = false
Setting default-features = false tells Cargo to ignore the author’s default
bundle, and leave the base implementation as the only part visible to our
application.
Now if we don’t explicitly opt back into at least some features, the crate will effectively compile down to the base implementation only, and our project may fail to compile — or lose functionality we rely on. Therefore, once we have disabled the default features, we may need to tune the feature flags for those parts we actually need.
For example, our application depends on the axum crate which, at version
0.8.9, by default, would pull in 9 features (namely form, http1,
json, matched-path, original-uri, query, tokio, tower-log, and
tracing). Actually, our application does not need that much. All it needs
is just a few:
[dependencies.axum]
    version = "0.8.9"
    default-features = false
    features = [
        "query",
        "tokio",
        "http1"
    ]
Sometimes the default features defined by the authors’ crate happen to be
exactly what we want. For example the openidconnect crate, as we can read
their Cargo.toml file published at
https://crates.io/crates/openidconnect/4.0.1/code/Cargo.toml#L151-L154
defines reqwest and rustls-tls as default features — exactly the two we
need. Our manifest still spells them out explicitly, so the intent survives
even if the crate’s defaults change later:
[dependencies.openidconnect]
    version = "4.0.1"
    default-features = false
    features = [
        "reqwest",
        "rustls-tls"
    ]
Tuning feature flags helps us trim the fat through several mechanisms:
-
Disabling Unused Transitive Dependencies
If a crate depends on a heavy database driver or an optional TLS library behind a feature flag, the code thatuses those downstream crates is itself wrapped in a#[cfg(feature = "...")]block. Disabling the feature flips that conditional-compilation switch off, so theusestatements and every call into those libraries are never compiled. When such a library is an optional dependency (turned on only by that feature), Cargo skips building it altogether. -
Faster Compilation Times
Conditional compilation discards inactive code before type-checking, sorustcand LLVM simply never see it. Every crate and feature combination eliminated means fewer lines of Rust code reach the compiler backend, which directly reduces your incremental and clean build times. -
Smaller Binary Footprint
Code hidden behind an inactive#[cfg(...)]predicate is not compiled at all, so there is nothing to link into the final executable. Fewer active code paths and zero unused dependencies yield a leaner binary.
Conditional Compilation
Cargo features and conditional compilation are two faces of the same coin: the
former is declared in our Cargo.toml, the latter is applied in the crate’s
Rust source code. Behind the scenes, every active feature is handed down to the
compiler as a --cfg feature="..." flag, and the crate author pairs each
feature with one or more
#[cfg(...)]
attributes that wrap the optional code:
#![allow(unused)]
fn main() {
// Compile this module only when the "tls" feature is enabled.
#[cfg(feature = "tls")]
mod tls_transport {
    // ...
}
}
Because #[cfg(...)] is evaluated before type-checking, switching a feature
off makes rustc discard the gated code altogether: it is never type-checked,
never sent to LLVM, and never linked into the final binary. That is precisely
why tuning the feature flags above translates so directly into faster builds
and smaller executables.
For completeness, Rust also ships the
cfg! macro,
which expands to a true/false literal at compile time instead of removing
code:
#![allow(unused)]
fn main() {
eprintln!("TLS support compiled in: {}", cfg!(feature = "tls"));
}
Unlike #[cfg(...)], cfg! does not remove any code: it simply expands to
true or false, so both branches are still type-checked and compiled. It is
therefore best reserved for diagnostics — such as logging which capabilities
were compiled in — rather than for gating heavy code paths.
Warning
This book is under development. Some chapters are still incomplete and the content may change without notice.
Configuration
Our application needs to be configured with settings that could change across deployments and that could depend on the particular IdP - Identity Provider in use.
#![allow(unused)]
fn main() {
// file: src/config.rs
// -------------------

pub enum IssuerType {
    Google, GitHub, Auth0, Keycloak, LinkedIn,
}

pub struct AppConfig {
    pub issuer_url: String,
    pub issuer_type: IssuerType,
    pub client_id: String,
    pub client_secret: String,
    pub scopes: Vec<String>,
    pub refresh_token_path: PathBuf,
}
}
Identity providers may differ in how they hand out refresh tokens, so our
application needs to know which provider it is targeting via the
OIDC_ISSUER_TYPE configuration setting.
String Representation Pattern
In general programming, providing an explicit method to convert an internal domain representation (like an enum variant or struct instance) into its string domain representation is known as the “Stringifier Pattern”.
Unlike implementing the
ToString
trait or standard string conversions which typically allocate a new heap string,
the conventional as_str() method explicitly promises a zero-copy reference
view, as it returns a string slice &str.
#![allow(unused)]
fn main() {
// file: src/config.rs
// -------------------

impl IssuerType {
    pub fn as_str(&self) -> &'static str {
        match self {
            IssuerType::Google   => "google",
            IssuerType::GitHub   => "github",
            IssuerType::Auth0    => "auth0",
            IssuerType::Keycloak => "keycloak",
            IssuerType::LinkedIn => "linkedin",
        }
    }
}
}
Once the conventional as_str() method is in place, the most obvious trait we
should implement immediately after is the Display trait:
#![allow(unused)]
fn main() {
impl std::fmt::Display for IssuerType {
    fn fmt(&self, f: &mut std::fmt::Formatter<'_>) -> std::fmt::Result {
        f.write_str(self.as_str())
    }
}
}
The natural counterpart to as_str() is parsing a string back into an enum.
This is usually done by implementing std::str::FromStr trait (or the
TryFrom<&str> trait):
#![allow(unused)]
fn main() {
impl std::str::FromStr for IssuerType {
    type Err = anyhow::Error;

    /// Parses the issuer type case-insensitively.
    fn from_str(value: &str) -> Result<Self, Self::Err> {
        match value.trim().to_ascii_lowercase().as_str() {
            "google"   => Ok(IssuerType::Google),
            "github"   => Ok(IssuerType::GitHub),
            "auth0"    => Ok(IssuerType::Auth0),
            "keycloak" => Ok(IssuerType::Keycloak),
            "linkedin" => Ok(IssuerType::LinkedIn),
            other => Err(anyhow!(
                "unknown OIDC_ISSUER_TYPE value '{other}'; expected one of: \
                 google, github, auth0, keycloak, linkedin"
            )),
        }
    }
}
}
Environment variables
Following the 12-Factor App recommendations,
our application configuration comes from the process environment, whose
variables are loaded using the dotenvy
crate.
# The relevant environment variables

OIDC_ISSUER_TYPE=Google
OIDC_ISSUER_URL=https://accounts.google.com
OAUTH_CLIENT_ID=<your-client-id>
OAUTH_CLIENT_SECRET=<your-client-secret>
OAUTH_SCOPES=https://www.googleapis.com/auth/youtube

# Optional: where to persist the refresh token (absolute or relative path).
# Defaults to `.refresh-token` when unset.
OAUTH_REFRESH_TOKEN_PATH=.refresh-token
This is well different from using configuration files like app.conf or
similar. Don’t get confused by the opportunity of using ../../.env file as
that must be seen just as convenience for bootstrapping environment variables
during local development only. The .env is not a configuration file or a
deployment mechanism. It is not the source of truth, and we should never put it
under version control. In production, the platform (Docker, Kubernetes,
Heroku, etc.) running our application sets real environment variables, and no
.env file exists!
Tip
The process environment is the single source of truth!
The ../../.env file’s only legitimate job is to eventually fill in missing values
for local development convenience — never to override an explicit environment,
and that the dotenv() function does precisely this.
Now we can read the Rust code, and immediately understand what it does:
#![allow(unused)]
fn main() {
// file: src/config.rs
// -------------------

use anyhow::{self, Context, Result};

// struct AppConfig ...

pub fn load() -> Result<()> {

    // A missing `.env` file is fine!
    // The variables are supposed to be already set in the process
    // environment (e.g. by the shell or a container). Only propagate
    // genuine errors, such as a malformed file.

    if let Err(err) = dotenvy::dotenv()
        && !err.not_found()
    {
        return Err(
          anyhow::Error::new(err).context("failed to load .env file")
        );
    }

    // Read environment variable one by one ...

    let issuer_url = dotenvy::var("OIDC_ISSUER_URL")
        .context("OIDC_ISSUER_URL must be set as environment variable")?;

    let issuer_type = dotenvy::var("OIDC_ISSUER_TYPE")
        .context("OIDC_ISSUER_TYPE must be set as environment variable")?
        .parse::<IssuerType>()?;

    // ... read more here ...

    // Finally make the AppConfig struct value
    let loaded_config = AppConfig {
        issuer_url,
        issuer_type,
        client_id,
        client_secret,
        scopes,
        refresh_token_path
    };

    // And set it into the global cell
    // ...
}
}
Thread-Safe Lazy Singleton Pattern
Our config::load() function loads and validates our application configuration,
then stashes the result in a process-wide OnceLock<AppConfig>, using the
“Thread-Safe Lazy Singleton” pattern, also known as “Lazy Initialization”.
In doing that, any other module can call the config::get() to obtain a
read-only reference to the loaded configuration.
#![allow(unused)]
fn main() {
// file: src/config.rs
// -------------------

use std::sync::OnceLock;
use anyhow::{anyhow, Result};

// pub enum IssuerType ...
// pub struct AppConfig ...

static CONFIG: OnceLock<AppConfig> = OnceLock::new();

pub fn load() -> Result<()> {
    // Load the configuration settings from somewhere
    let loaded_config: AppConfig = ...;

    // And set it into the global cell
    CONFIG
      .set(loaded_config)
      .map_err(|_| anyhow!("AppConfig is already initialized"))
}

/// Returns the process-wide, read-only configuration.
pub fn get() -> &'static AppConfig {
    CONFIG
      .get()
      .expect("AppConfig not initialized; call load() first")
}
}
When declared as a top-level item, the static keyword creates a single memory
location that lives for the entire duration of the program. Unlike const,
which inlines its value wherever it is used (creating copies in code), a static
item occupies a fixed, unique location in RAM. Passing a reference to a static
passes an actual pointer to that exact memory address.
The initial value of a static item must be known at compile time, or lazily
initialized using the OnceLock<T>. This kind of lock provides a thread-safe
synchronization primitive that allows an item to be initialized exactly once
upon its first access at runtime.
Warning
This book is under development. Some chapters are still incomplete and the content may change without notice.
Discovery
…
Warning
This book is under development. Some chapters are still incomplete and the content may change without notice.
…
Warning
This book is under development. Some chapters are still incomplete and the content may change without notice.
Authorization Code Grant
The Authorization Code Grant (RFC 6749, §4.1) is the standard OAuth 2.0 flow for confidential clients, and what our OAuth Client Rust application falls back to whenever no valid refresh token is available.
Because our client requests only the openid scope, this same flow doubles as
an OpenID Connect authentication request: in return for the access token it
also receives an identity token (id_token) describing who just signed in. It
is best understood as two phases, separated by the channel each message
travels over:
sequenceDiagram
    participant C as Client App
    actor B as User (Browser)
    participant S as OAuth Server

    rect rgb(236, 242, 254)
    Note over C,S: FRONT-CHANNEL — through the browser
    C->>B: 1. Open the browser at the authorize endpoint<br/>(response_type=code, client_id, redirect_uri, scope=openid)
    B->>S: 2. GET /authorize (same parameters)
    S->>B: 3. Authenticate the user & request consent
    B->>S: 4. User approves access
    S->>B: 5. 302 Redirect to redirect_uri (?code=AUTH_CODE_123)
    B->>C: 6. GET /callback (?code=AUTH_CODE_123)
    end

    rect rgb(254, 236, 232)
    Note over C,S: BACK-CHANNEL — direct communication, the browser is not involved
    C->>S: 7. POST /token<br/>(grant_type=authorization_code, code, redirect_uri, client_id, client_secret)
    S->>C: 8. access_token + id_token (+ refresh_token)
    C->>S: 9. GET /userinfo (Authorization: Bearer access_token)
    S->>C: 10. user claims
    end
The flow starts when our Client App builds an authorization request and opens
the user’s browser at the identity provider authorize endpoint, carrying
four core orchestration parameters: response_type=code (asking for an
authorization code), client_id (who is asking), redirect_uri (where to send
the answer), and scope=openid (the OpenID Connect signal that we are
authenticating the user and, in return, want an identity token plus an access
token for the /userinfo endpoint) — step 1.
The browser carries that request to the OAuth Server (step 2), which
authenticates the user and asks for consent (steps 3–4). On approval, the server
redirects the browser back to the redirect_uri, appending the authorization
code to the query string (step 5). The browser dutifully follows that redirect
and hits our ephemeral /callback endpoint with ?code=AUTH_CODE_123 (step 6).
At this point the Client App holds the authorization code but no tokens yet.
It exchanges the code for tokens by POSTing directly to the provider’s token
endpoint, this time sending grant_type=authorization_code, the code, the
redirect_uri, and — because we are a confidential client — the client_id
and client_secret (step 7). The OAuth Server validates the request and
responds with the two tokens we asked for (step 8): an access_token — the
bearer credential used to call protected endpoints such as /userinfo — and an
id_token, a signed JSON Web Token that asserts who just authenticated.
Providers may additionally return a refresh_token for later re-use.
To read the authenticated user’s profile, the client finally presents that
access_token to the provider’s userinfo endpoint (step 9), which answers
with the user’s claims (step 10). The id_token already carries the core
identity (its sub claim), while /userinfo can supply richer, up-to-date
profile attributes.
Warning
This book is under development. Some chapters are still incomplete and the content may change without notice.
Channels
The single most important architectural detail of the Authorization Code Grant is the channel a message travels over, and it dictates what may be carried on each leg.
Front-channel
The first six steps all travel through the user’s browser, as plain HTTP
redirects. The browser is a passive intermediary: it forwards the authorization
request to the OAuth Server, and later forwards the authorization response
(carrying the code) back to our /callback endpoint. Everything on this
channel is visible in the browser’s address bar and history, so only public
parameters (such as response_type, client_id, redirect_uri,
scope=openid, state, nonce, and later the code itself) may ever appear
here — never a secret.
#![allow(unused)]
fn main() {
use anyhow::Result;
use openidconnect::{AuthorizationCode, RedirectUrl};
use openidconnect::core::CoreAuthenticationFlow;
use tokio::sync::oneshot::Receiver;

// type DiscoveredOidcClient = ...
// type CallbackOutcome = ...
// type FrontChannelOutcome = ...

async fn run_authorization_code_flow_front_channel(
    oidc_client: &mut DiscoveredOidcClient
) -> Result<FrontChannelOutcome> {

    // Spawn the ephemeral `/callback` endpoint that will receive the `code`
    let (callback_url, callback_rx): (String, Receiver<Result<CallbackOutcome>>) =
        callback::spawn_endpoint().await?;

    // Attach the callback URL as the `redirect_uri` the OAuth Server will send
    // the authorization `code` back to.
    //
    // `set_redirect_uri` consumes the client and returns the updated one, so clone
    // ours, set the URI, and assign the result back through the `&mut` reference.
    *oidc_client = oidc_client
        .clone()
        .set_redirect_uri(
            RedirectUrl::new(callback_url)?
        );

    // Generate the authorize URL with all parameters
    let (authorize_url, _, _) = oidc_client
        .authorize_url(
            CoreAuthenticationFlow::AuthorizationCode,
        )
        // The `openid` scope is added automatically by the underlying library
        // .add_scopes(...)
        .url();

    info!("Opening the browser to the authorize URL {}", authorize_url);
    // TODO webbrowser::open(authorize_url.as_str())?;

    // Await the callback outcome (mainly the auth code).
    // Note that the outer `?` handles an eventually dropped one-shot channel (RecvError);
    // while the inner `?` propagates the authorization failure reported by the callback
    // endpoint (e.g. the user denied consent).
    let code = callback_rx.await??;
    info!("OAuth code is: {}", code);

    Ok(FrontChannelOutcome {
        code: AuthorizationCode::new(code),
    })
}
}
Back-channel
Steps 7 through 10 go directly between the Client App and the OAuth Server,
bypassing the browser entirely. The token exchange happens here. Because the
channel is not exposed publicly, the client can safely present its
client_secret, and neither the access_token nor the id_token ever transits
the user’s browser.
Splitting the flow this way is what lets the client hand the user a short-lived
code through the front-channel, while turning that code into tokens only after
it has authenticated itself on the back-channel.
Warning
This book is under development. Some chapters are still incomplete and the content may change without notice.
Parameters
The Authorization Code Grant’s front-channel carries only a handful of parameters, and each one exists for one of two reasons: to orchestrate the flow (routing the request and its answer) or to secure it (binding the answer to the session that started it). The sequence diagram above shows only the orchestration parameters for clarity; the two security parameters below travel on the same front-channel request.
Core protocol orchestration
These parameters are bout who is asking, and where the answer goes:
-
response_type=code
tells the Authorization Server to return an authorization code instead of a token. -
client_id
identifies which OAuth2 Client application is asking. -
redirect_uri
the callback URL the Authorization Server redirects the user (and thecode) back to after consent. -
scope=openid
declares the OpenID Connect intent: authenticate the user and return an identity token plus an access token for the/userinfoendpoint.
Scopes
…
Vulnerability resolutions
These additional parameters bind the answer back to the request and serve the purpose to resolve vulnerabilities and mitigate security attacks (as better explained in the next section):
-
state
an opaque, unguessable value the client generates and stores before sending the authorization request; the Authorization Server echoes it back verbatim on the callback, and the client rejects the callback if the two differ. This single check defeats the account-linking attack below, which is whystateis commonly referred to simply as the CSRF token. -
nonce
an OpenID Connect addition: a one-time value the client sends with the authorization request and the Authorization Server binds into the returnedid_token. The client compares it when validating the ID token, so a token replayed from an unrelated flow is rejected.
Warning
This book is under development. Some chapters are still incomplete and the content may change without notice.
Vulnerabilities
The Authorization Code Grant is not secure by itself: the front-channel is a
series of plain browser navigations, and the callback is a public URL that
anyone can make a browser visit. Parameters such as state and nonce were
added to protect from the following attacks.
Account Linking Attack
The account-linking attack exploits the fact that the callback request carrying
the code (step 6) has no built-in way to prove it belongs to the session that
initiated the flow. The attacker abuses this between steps 5 and 6:
- The attacker starts an authorization request of their own and authenticates
as themselves. The Authorization Server answers with a redirect carrying a
codebound to the attacker’s account, such ashttp://localhost:67852/callback?code=<ATTACKER_CODE>. - Instead of letting their own browser follow that redirect, the attacker captures it and tricks the victim into navigating to it — via a link, an image tag, or a page the victim visits.
- The victim’s Client App receives a perfectly valid
codeand exchanges it for tokens — but those tokens identify the attacker, not the victim. - The victim’s session is now silently bound to the attacker’s identity. If the victim then acts on the app — uploading data, or linking their own account — those actions land on the attacker’s account, which the attacker can later sign in to and read.
The root cause is that a code is an opaque value the client cannot
distinguish: it cannot tell whether the code came from a request it issued
itself, or whether someone else injected it into the flow.
The defense is to make the callback provable as the response to the client’s
own request. Before redirecting to the Authorization Server, the client
generates a random, unguessable state, keeps it, and sends it along on the
authorization request (step 1). The Authorization Server must echo it back
unchanged on the callback (steps 5–6), and the client rejects the callback
whenever the two values differ.
The attack now collapses: an attacker can no longer replay a code from a flow
they started, because that code comes back with the attacker’s state — or
with none at all — and will never match the state the victim’s client
generated. Only the client that started the flow knows its own state, so only
a legitimate round-trip survives the check.
This is exactly a Cross-Site Request Forgery (CSRF) defense (see
RFC 6749 §10.12):
the attacker forges a request — the callback navigation — that the victim’s
browser executes in the victim’s session, and state is the unpredictable
secret that must be echoed back to prove the request was genuinely initiated by
that session. That is why state is so often called the CSRF token — and in
our Rust implementation it literally is one:
ID Token Replay Attack
…
The following Rust snippet demonstrates how to mitigate both the CRSF attack and the ID Token Reply attack.
#![allow(unused)]
fn main() {
use openidconnect::{CsrfToken, Nonce};
use openidconnect::core::CoreAuthenticationFlow;

// type DiscoveredOidcClient = ...

async fn run_authorization_code_flow(oidc_client: DiscoveredOidcClient) -> Result<AccessToken> {

    // Spawn the ephemeral `/callback` endpoint
    let (callback_url, callback_rx) = callback::spawn_endpoint().await?;

    // Set the callback URL
    let oidc_client = oidc_client
        .set_redirect_uri(
            RedirectUrl::new(callback_url)?
        );

    // Generate the unguessable state and nonce
    let state = CsrfToken::new_random();
    let nonce = Nonce::new_random();

    // And then generate the authorize URL including them
    let (authorize_url, _, _) = oidc_client
        .authorize_url(
            CoreAuthenticationFlow::AuthorizationCode,
            || state,
            || nonce
        )
        .url();

    // Open the browser with the "authorize URL"
    // ...

    // Await the callback outcome so to receive both the auth `code`
    // plus the echoed `state`
    let CallbackOutcome { code, state: echoed_state } = callback_rx.await??;

    // Check if they match
    if &echoed_state != state.secret() {
        anyhow::bail!("OAuth state mismatch: possible CSRF attack!");
    }

    // TODO
}
}
Warning
This book is under development. Some chapters are still incomplete and the content may change without notice.
Callback
…
Warning
This book is under development. Some chapters are still incomplete and the content may change without notice.
Refreshing an Access Token
The access token handed out by the Authorization Code Grant is short-lived.
When the provider also issues a refresh_token, our client can trade that
long-lived credential for a fresh access token without sending the user
through the browser again
(see RFC 6749, §6).
To make that possible across process restarts, the client persists the refresh token to a local file and loads it back on the next run. Only when that file is missing — or the provider rejects the token — does the client fall back to the full browser flow.
Where the token is stored
Making the location configurable lets the same binary run unchanged on a laptop, in a container, or on a server:
-
OAUTH_REFRESH_TOKEN_PATH
the environment variable naming the storage path; it may be either an absolute or a relative path, and a relative path is resolved against the current working directory. -
.refresh-token
the default used when the variable is not set, so the client still works out of the box.
# An absolute path, e.g. inside a writable system directory
OAUTH_REFRESH_TOKEN_PATH=/var/lib/oauth2-client/refresh-token

# A nested relative path, resolved against the working directory
OAUTH_REFRESH_TOKEN_PATH=.secrets/refresh-token
The token is a secret, so the default file is listed in .gitignore and must
never be committed. Following the 12-Factor App advice, the setting still
arrives through the environment; the config module reads it once and exposes
it to the rest of the program.
#![allow(unused)]
fn main() {
// file: src/config.rs
// -------------------

pub struct AppConfig {
    pub issuer_url: String,
    pub issuer_type: IssuerType,
    pub client_id: String,
    pub client_secret: String,
    pub scopes: Vec<String>,
    pub refresh_token_path: PathBuf,
}

/// Fallback location, used when `OAUTH_REFRESH_TOKEN_PATH` is not set.
const DEFAULT_REFRESH_TOKEN_PATH: &str = ".refresh-token";

// ... inside `load()` ...

// Unlike the settings above, this one is optional: it silently falls
// back to the default so the client keeps working out of the box.
let refresh_token_path = PathBuf::from(
    dotenvy::var("OAUTH_REFRESH_TOKEN_PATH")
        .unwrap_or_else(|_| DEFAULT_REFRESH_TOKEN_PATH.to_string()),
);
}
The store module
A dedicated store module isolates the two filesystem operations behind a
small API, so the rest of the code never deals with paths directly. Both
functions resolve the path from the global configuration and attach the
offending path to any error they propagate.
#![allow(unused)]
fn main() {
// file: src/store.rs
// ------------------

use anyhow::{Context, Result};
use std::path::PathBuf;
use tokio::fs;

use crate::config;

fn refresh_token_path() -> PathBuf {
    config::get().refresh_token_path.clone()
}
}
Loading is deliberately forgiving: a missing or empty file is not an error, it simply means the client has not stored a token yet, and the caller should run the Authorization Code flow instead.
#![allow(unused)]
fn main() {
// file: src/store.rs
// ------------------

pub async fn load_refresh_token() -> Result<Option<String>> {
    let path = refresh_token_path();

    if !fs::try_exists(&path).await.with_context(|| {
        format!("failed to check refresh token file {}", path.display())
    })? {
        return Ok(None);
    }

    let token = fs::read_to_string(&path).await.with_context(|| {
        format!("failed to read refresh token file {}", path.display())
    })?;

    let token = token.trim().to_string();
    if token.is_empty() {
        Ok(None)
    } else {
        Ok(Some(token))
    }
}
}
Saving is the more interesting half. Before writing, the client creates every
missing intermediate directory so that a deep absolute path such as
/var/lib/oauth2-client/refresh-token works on the very first run.
#![allow(unused)]
fn main() {
// file: src/store.rs
// ------------------

pub async fn save_refresh_token(refresh_token: &str) -> Result<()> {
    let path = refresh_token_path();

    // Create all missing parent components. A bare filename such as
    // `.refresh-token` has an empty parent, which `create_dir_all`
    // rejects, so skip it and write into the working directory.
    if let Some(parent) =
        path.parent().filter(|p| !p.as_os_str().is_empty())
    {
        fs::create_dir_all(parent).await.with_context(|| {
            format!(
                "failed to create directory {} for refresh token",
                parent.display()
            )
        })?;
    }

    fs::write(&path, refresh_token).await.with_context(|| {
        format!("failed to write refresh token to {}", path.display())
    })?;

    Ok(())
}
}
Putting it together
flowchart TD
    S["save_refresh_token(token)"] --> R["resolve OAUTH_REFRESH_TOKEN_PATH"]
    R --> P{"parent is non-empty?"}
    P -->|yes| C["create_dir_all(parent)"]
    P -->|no| W["write token to file"]
    C -->|permission denied| X["bail out with path context"]
    C -->|ok| W
    W -->|permission denied| X
    W -->|ok| D["done"]
The two failure modes the client refuses to swallow are called out explicitly:
-
Directory creation denied
a read-only parent or a path the process may not traverse aborts the run with a message naming the directory. -
Write denied
a missing write permission on the target file aborts the run with a message naming the file.
In both cases the error is enriched with .with_context(...) and bubbles up
to main, which logs it and exits with a non-zero status — no token is
silently dropped.